The concept of creating handmade websites from scratch is gradually taking a backseat.
Presently, 67.39% of business owners prefer to use AI Website Builders. Although websites serve as the focal point of brand identity, developing high-quality websites from scratch that attract the target audience and convert them into leads requires time and skill.
There are various technical complexities involved such as coding, creating a user-friendly design, platform configuration, and content optimization. This might seem challenging to the budding business owners and entrepreneurs who might not have an expert tech team.
AI-powered website builders have been able to redefine the landscape of web design and have transformed the way websites are developed or customized. Many companies are turning to automated approaches for website development and design.
Hostinger AI Website Builder is one such platform that has created a major shift in the creative process of developing and launching websites.
Though Hostinger is essentially known as a web hosting and digital service provider, it has evolved with the changing times and launched a specialized AI website builder.
By combining intelligent automation with intuitive design, it aims to eliminate all technical complexities, enabling users to create professional websites with minimum effort and time without compromising their creative vision.
What is Hostinger AI Website Builder?
From a traditional hosting website provider, Hostinger has emerged as an all-in-one platform for web development. By leveraging artificial intelligence, Hostinger AI Website Builder helps users create professional websites effortlessly and quickly. Users don’t have to go through the hassle of manually selecting templates, developing elaborate codes, or managing plug-ins.
It primarily involves a prompt-based system where users can enter the name of the brand, the type of website they want to create, and provide a brief but accurate description of the business, along with the preferred style and tone.
The AI builder then generates a functional website based on the inputs of the users, making sure it is completely aligned with the vision.
The second step involves the drag-and-drop editor. After the site is created, the drag-and-drop editor allows users to make quick adjustments to text, colour, schemes, and images. From the process of generation to every level of customization, all the steps are designed thoughtfully for the non-technical users.
The well-organized dashboard helps users navigate through the process of content management, customization of layouts, SEO settings, and publishing the website. Without any expertise in coding, users can create ready-to-launch websites that help them establish a distinct online presence and stand out. This is particularly useful for independent artists, content creators, and small-scale entrepreneurs who do not want to invest in costly developers.
Hostinger AI Website Builders ensures ease of use through its cohesive integration and all-in-one approach. From web hosting, domain maintenance, analytics to security (SSL), or e-commerce options, it connects everything under one unified system, saving the users from the hassle of juggling multiple platforms.
While Hostinger AI Website Builders enable users to build professional websites with the least amount of effort, does it offer the desired level of customization or efficiency? Can it match the intricacies or personal touch of human design?
In this analysis, we will uncover the features, strengths, as well as limitations of Hostinger AI Website Builder and understand whether it is a practical choice for users in 2025.
Features of Hostinger AI Website Builder
1. AI-Powered Website Generation
This is one of the most important features that makes the platform relevant for non-technical users. The process that took weeks for developers to complete can be done within a few minutes by users just by answering a few questions, including the purpose of the website (whether it is a blog, portfolio, business, or store).
Users also have to mention the specific design styles or the colours and tones preferred by them. After these inputs, the AI engine generates a complete draft comprising well-defined structure, visuals, layout, built-in pages, and content within a few minutes.
Though the output seems restricted in terms of creative flexibility, the results are uniform and cohesive. Most importantly, users get access to a functional site without going through technical hurdles like hosting set-up, picking themes, or coding.
In case users are looking for advanced design or sophisticated branding, they have the freedom to customize according to their terms.
2. Drag-and-Drop Editor
While the initial draft of the website created by the AI tool has a clean and functional design, the users might want further options to tweak or refine the text and layout. The Drag-and-Drop Editor has an intuitive design that allows users to adjust the visuals, text, or specific sections in real-time without any coding.
The interface is designed in such a way that the users can edit or resize the elements seamlessly directly on the page.
Renuka Prasad, All-rounder,| lithuaniacricket.com, used the drag-and-drop editor of Hostinger AI Website builder and found this feature pretty helpful. He said, “Building our website was user-friendly. We simply drag and dropped the text and images around to make our website look the way we wanted.”
3. Pre-Designed Templates
Keeping the requirements of various industries in mind, Hostinger offers more than 150 customizable templates.Be it business, blogs, portfolios or e-commerce stores, every industry has specific requirements.
The users can explore the options and choose the template that is aligned with the specific industry needs.The thoughtfully designed templates have separate sections for content, visuals, and CTAs. Through the visual editor, users can make changes to the text, images, layout, and font. The flexible editing and the variety of options help the users personalize the templates to form a distinct brand persona.
Even after the changes are made, the overall design aesthetics and spacing remain intact.This makes sure that the overall output looks professional and sophisticated. As the users keep customizing the template, the design adapts itself to look consistent across all devices.
a. AI-Assisted Content Features
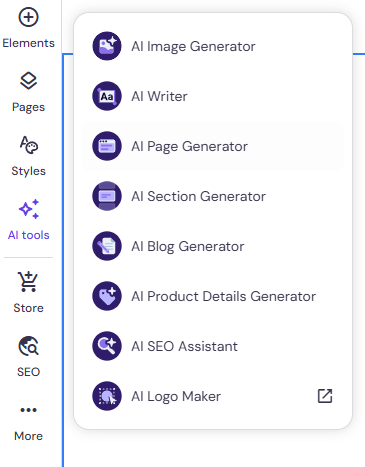
Traditionally, content and design are different avenues that are handled by separate tools. By bridging the gap between content and design through AI-Assisted Content Features, Hostinger eliminates all the barriers related to content creation.
The variety of tools helps the users create a streamlined workflow with text, visuals, meta titles, and SEO in one place, saving time and expediting the process.
The tools are as follows:
b. AI Writer
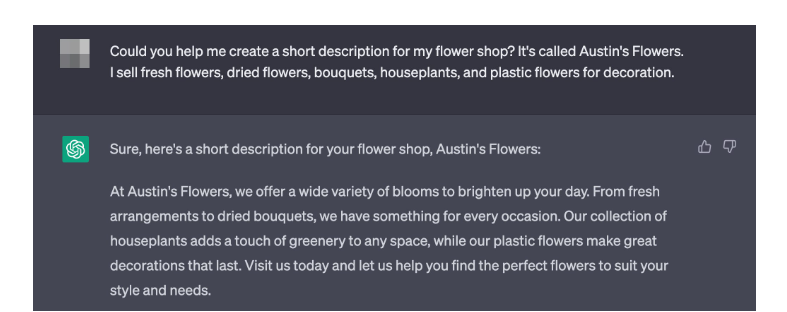
It is the perfect tool for small companies that do not have the budget for a separate content team. This built-in feature helps users develop high-quality and engaging content for professional websites, eliminating the hassle of writing it from scratch.
According to the inputs provided by the the user, the AI writer generates catchy headlines, website copy, and product descriptions aligned with the objective of the site.
c. AI Image Generator
This tool makes sure users do not have to depend on stock photos. It generates suitable images that complement the overall aesthetics of the website according to the inputs of users.
For example, if a user is building a website for organic food products, they can simply give a prompt saying “ aesthetic image of organic food products on a warm beige background.” The AI image editor will generate engaging visuals that are aligned with the prompt.
d. AI Product Info Generator
If you are setting up an e-commerce store, all you need to do is upload the image of the product. The AI Product Info Generator writes suitable titles, detailed product descriptions with all the essential information, including specifications, labels, and subtitles.
Without any prior experience in professional copywriting, the users can set up a professional site efficiently and quickly that can make an impression in the minds of the visitors.
e. AI SEO Assistant
This tool enhances the traffic and visibility of the website From discovering the right keywords that perform well in search results, suggesting meta descriptions or meta tags, driving conversions, refining page structure for higher ranking results, or highlighting major SEO gaps, it offers actionable data-backed insights on improving the SEO performance and boosting organic traffic.
5. E-commerce Support
Available exclusively in the Business Plan, this helps users create online stores with minimal technical friction and within a few hours. It has features like product listings, shopping carts, payment gateway integrations, and product generators, all in one platform.
From adding products, managing inventory, tracking sales, to creating listings, processing payments through multiple gateways, or offering discounts, it makes every process seamless for users. Users get access to all the essentials for the e-commerce store in the same unified dashboard where AI tools, content, and design are available.
This makes sure they do not have to juggle between platforms. Though it lacks advanced features like premium online stores, it is perfect for budding entrepreneurs and start-ups that are just stepping into the online retail sector and want to start selling quickly.
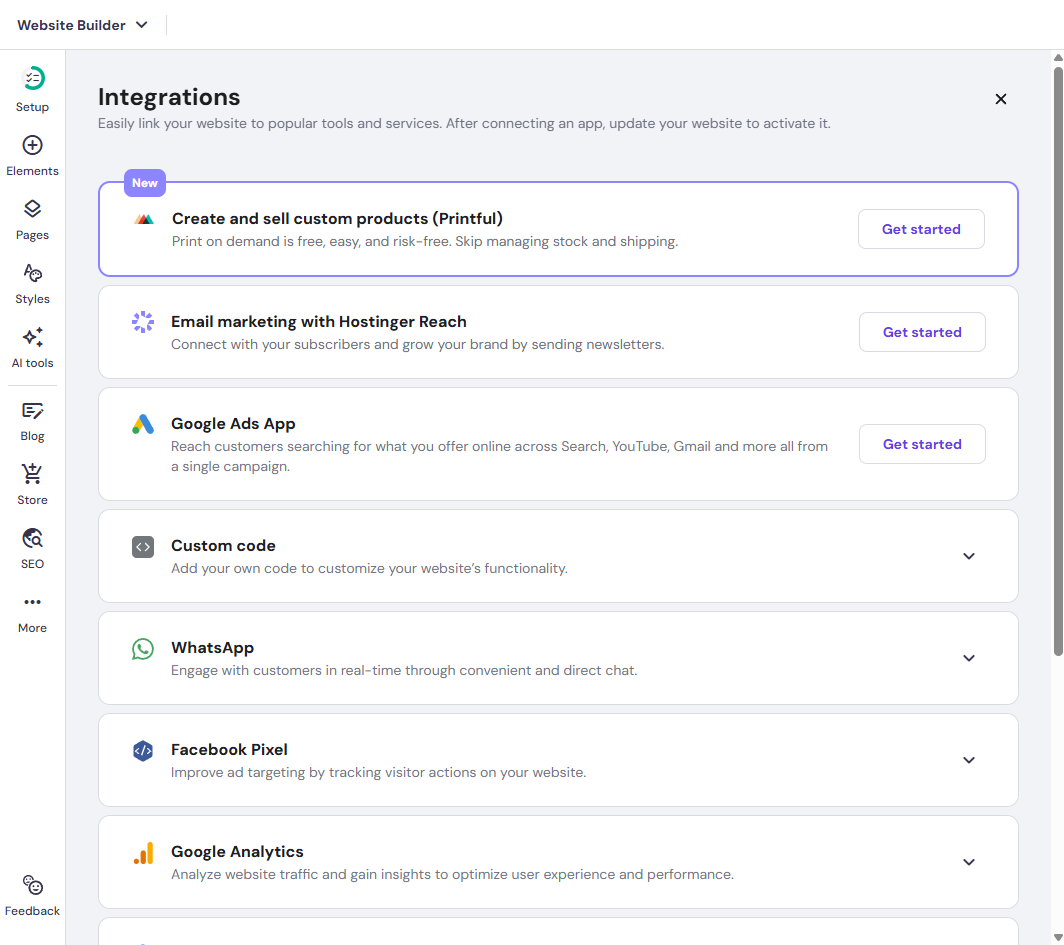
Hostinger also offers on-demand integration through Printful. Without having an inventory or pre-stocking products or thinking about logistical isssues, you can sell a wide range of custom products ranging from posters, hoodies, caps, phone cases, to mugs. However, you only have to make the payment when you receive an order from the customers. Hostinger does not charge transactional costs.
The process is easy and simple. First, the users have to install the Printful app on the AI builder. Click on integrations and click on Get Started. Click on Get Started again and ‘Add Printful’. From the Hostinger dashboard, you can design your product. There are more than 400 products on the catalogue. Just upload your design, choose from the wide range of options, personalize the products, and determine the pricing all on the dashboard. The Printful app will take care of the billing, shipping details and send the customized products to the customers. It is the best possible option for budding businesses or artists.
6. Free Domain & SSL
Hostinger AI Website Builder takes care of both identity and security through free domains and unlimited SSL certificates. Without any unexpected charge, users can get a custom name to establish the identity and credibility of the brand. However, this is available for annual billing plans.
On the other hand, it offers unlimited SSL certificates that protect the data of the visitors. It also displays the “https://” in the URL that builds a sense of credibility and trust.
Users do not need to count on third-party rules or install it manually. The SSL becomes operational automatically when the site is launched. It makes sure that the entire experience of launching the site is safe, quick and reliable. This feature appeals to the new users.
7. Cloud Hosting
Hosting is not an additional feature, but an integral part of the main system.The AI Website Builder of Hostinger operates within the framework of the cloud hosting service.
If users choose to develop and design their website through the AI website builder of Hostinger, it is published directly on the robust cloud server. This indicates that the advanced infrastructure can handle technical services such as managing storage or handling data.
It ensures scalable and seamless performance of the website even during sudden surge of traffic. It offers better security, fast loading time, and uptime which makes the concept of website management simpler.
Developing a Website through AI Website Builder
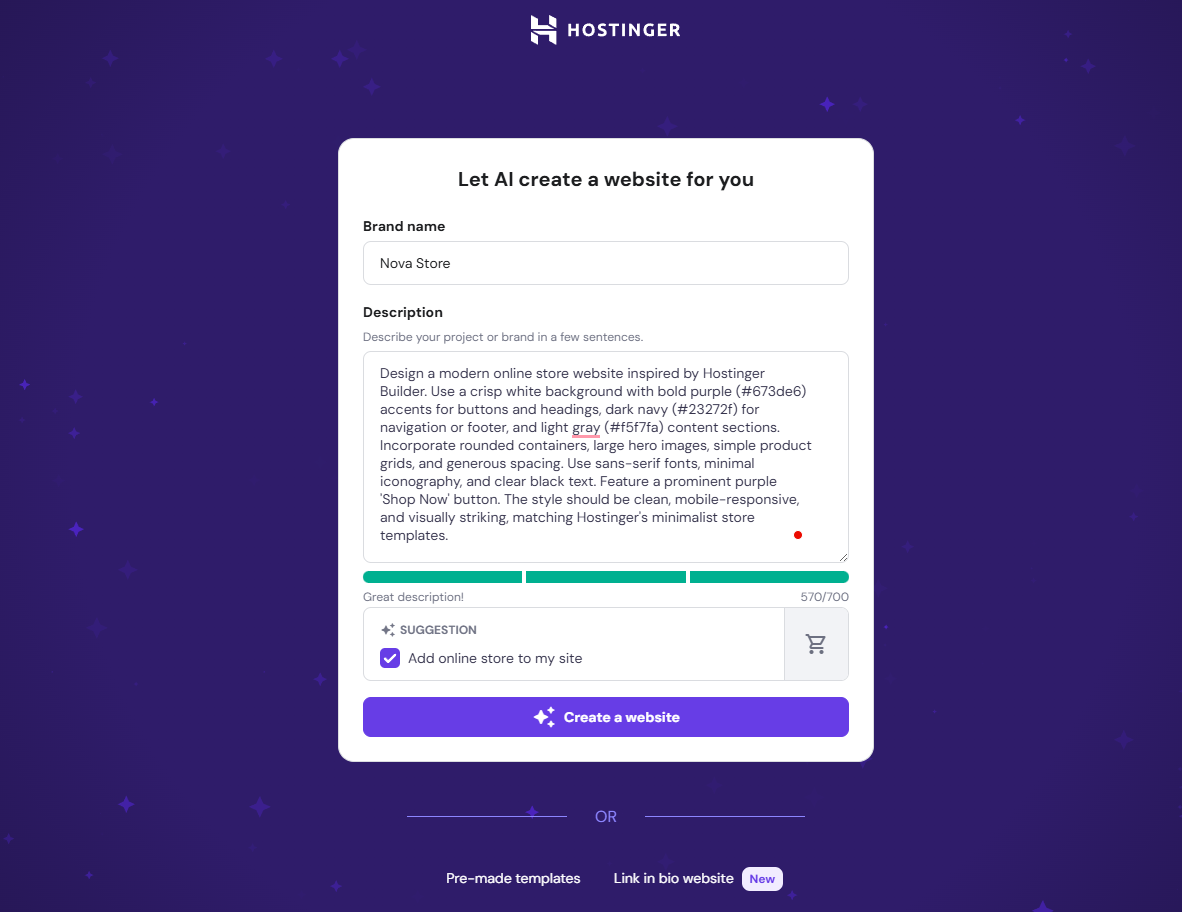
1. Enter your brand name
The process of building a website starts by entering the name of your brand.
If the brand name is within the limit of 20 characters, the builder will come up with a.SVG wordmark logo that is perfectly aligned with your branding. If it exceeds the limit of 20 characters, it will generate a generic logo.
It is advisable to use a short and punchy name to have a distinct logo that establishes a distinct brand personality.
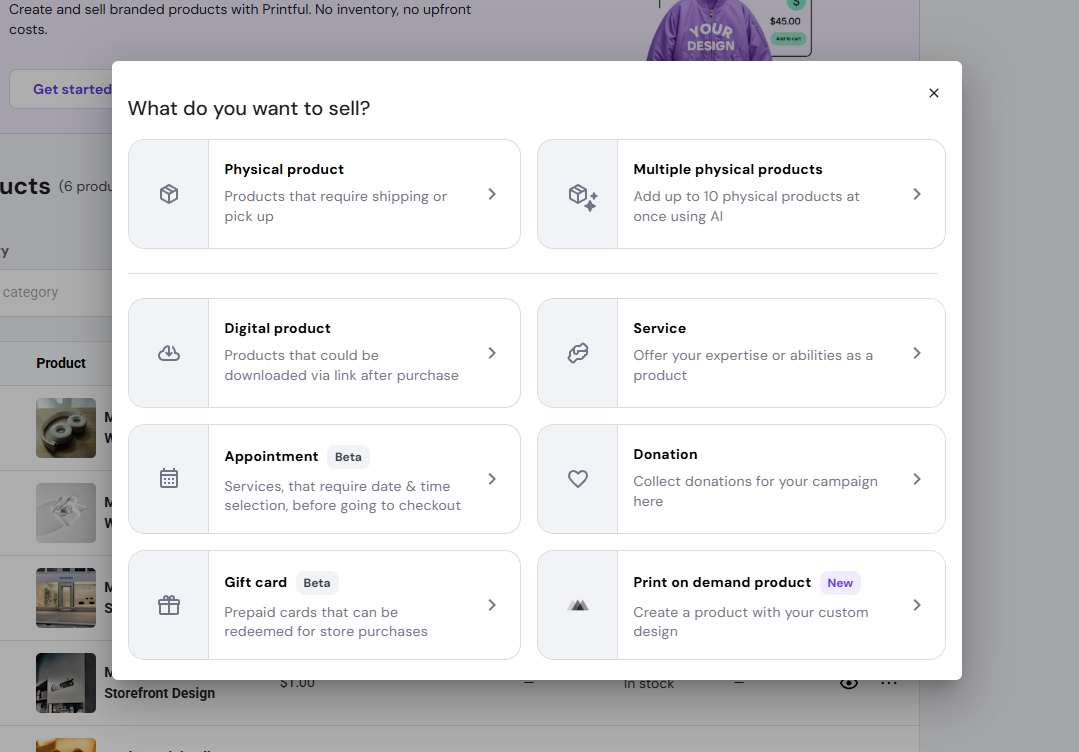
2. Define the objective of your website
This is the second step where you clearly define the objective of your website.
There are multiple options including online store, blogs, landing page, portfolio, business showcase, and others. If the users want to set up online stores or blogs, the AI builder goes beyond generic templates and adds system-level features and pages that are relevant to the intent of the website.
On the other hand, if you choose the other options, you will get a simpler template with generic homepage and minimalist layout open to customization by users.
3. Highlight the mission and value proposition of your brand
This is an important step as it will assist the AI builder to form an in-depth understanding of your brand, its guiding principles, functions, goals, features, services and the value it aims to add.
Keep the character count within 700( including spaces) but provide important details about your services and focus on the factors which make it stand out. The content generated by the AI builder will be exclusively tailored for your brand. If you are satisfied with the content, click on ‘create a website.’
4. Create a visual identity with colours and tones
This step involves determining the aesthetics and look and feel of your brand. By clicking on personalization settings, you can select the website style. If you want to assign the three primary colour specifications, click on ‘My colour palette’ However, the colour schemes can also be changed after the site is launched.
Click on ‘create a website’ after you make the changes.
Building a blog
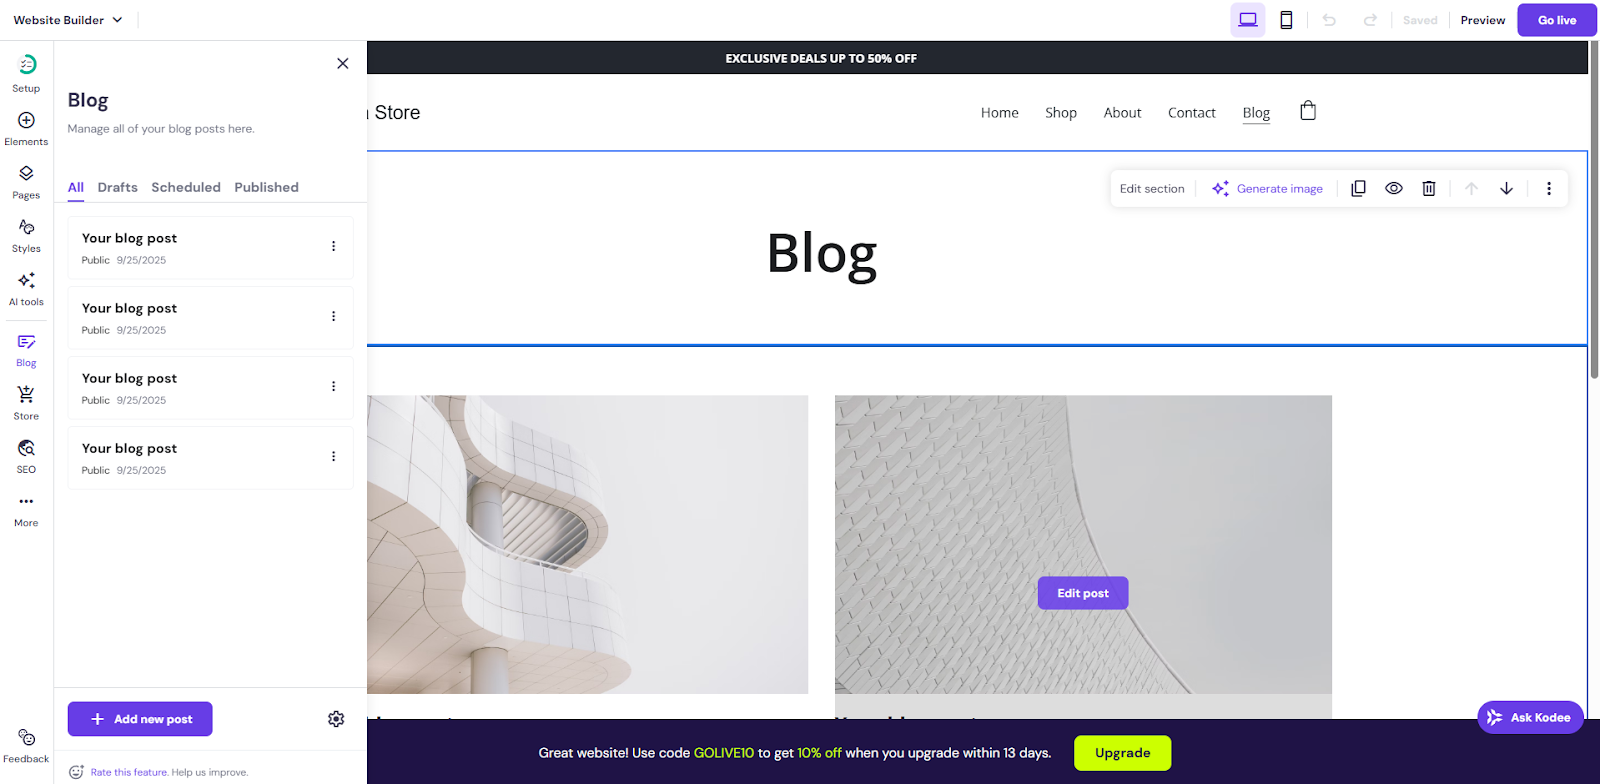
1. Add blog functionality
The builder dashboard features the ‘Blog’ section. Click on the section and a blog/article page will be created where you will have the freedom to manage stories, features, categories, columns, and visual hierarchy that align with your online publishing site or magazine. This will enable you improve the navigation experience and user engagement.
2. Create articles and structure it
The built-in editor allows you to add your first article for your online publishing site or magazines. Add texts, subheadings, images and videos to make the article or the story look engaging. You can improve the SEO ranking with suitable meta titles and descriptions. .
3. Improve reader journey through categories and tags
When users visit your site, they often look for particular stories or genres that interest them. Organizing the stories or articles with particular categories (lifestyle, sports, news, culture, politics, and editorial) will help users navigate through the editorial beats, improving the browsing experience of the readers. You can also create author profiles to build a sense of credibility. If you are publishing an article on ‘How to control diabetes’ or ‘How to find the best montessori school for my child’, adding a tag of ‘How-to’ will improve its searchability and help the readers find what they are looking for. .
4. Adjust SEO settings to improve visibility
After these steps, the next step would be improving the SEO rankings to ensure that the right article reaches the right audience. Add keywords in the headings, subheadings, and throughout the article to drive traffic. You can also edit URLs, meta descriptions, and ensure proper internal linking to make sure the story gets an impressive ranking on Google.
5. Preview and test before publishing
Before the final step, you have to make sure the article looks good aross all devices including desktop, mobile, or tabs and offers the perfect reading experience you want to offer and reduce bounce rates. Pay attention to minute details such as loading time and templates as these will determine the time the visitors will spend reading the article.
6. Publish the article/story
This is the last step. If you think that the article is immersive and engaging enough to capture the attention of the readers, click on ‘publish’. Your article will be live instantly. However, if you want to make changes to the articles after the article is published, you can always come back and add sections or insert relevant data to make sure that the article stays updated with the recent information. To break the monotony, you can also restructure the templates.
Building an e-commerce store:
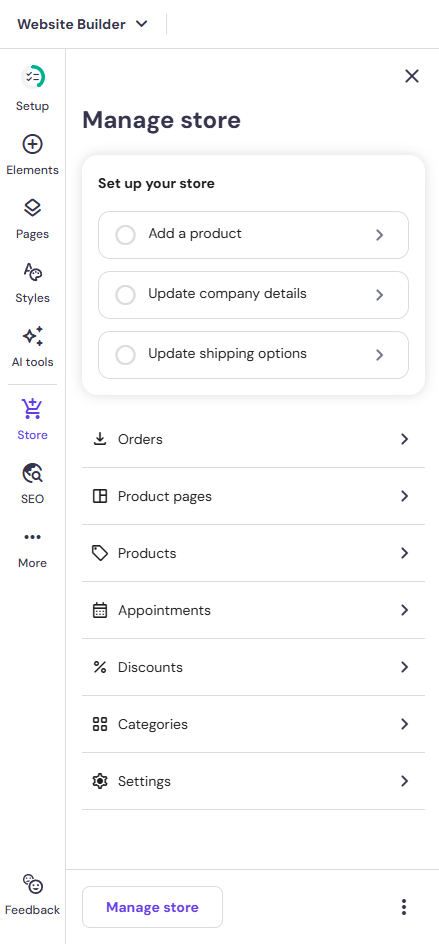
1. Add store pages
Create essential pages: Home, Shop, Product Details, Cart, Checkout, About, and Contact.
2. Add products
Enter product names, descriptions, images, pricing, and variations (sizes, colors, etc.).
3. Set up categories
Organize products into categories for easier browsing.
4. Configure payment methods
Enable payment gateways like Stripe, PayPal, or card payments.
5. Set shipping options
Define delivery methods, regions, and rates.
6. Adjust tax settings
Configure tax rules based on your location and target markets.
7. Enable store settings
Add policies (returns, privacy, terms), currency, and language preferences.
8. Test checkout process
Run a test order to ensure payments, shipping, and confirmation emails work correctly.
9. Publish your store
Go live and start accepting customers.
Customization features
1. Colours
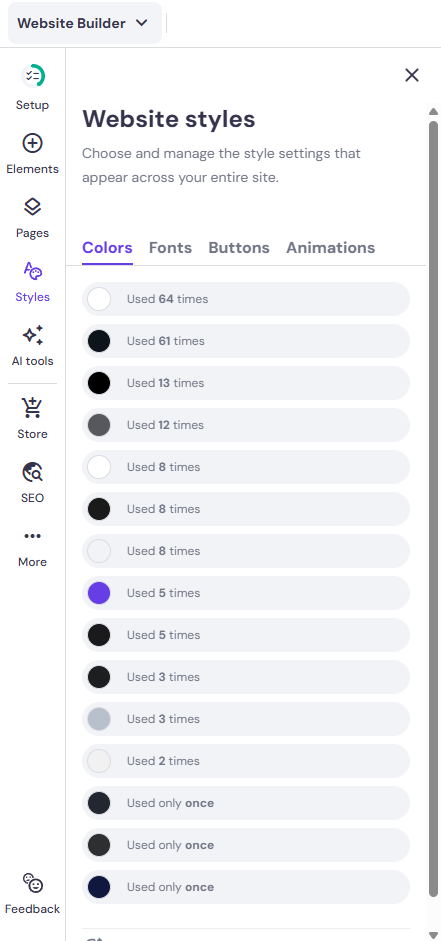
The users can customize the colours in two ways: locally and globally.
Global
If you want to change the colours globally, the action will be reflected throughout the website.
In case you want to change the primary colour to light green, every brand element such as the background colour, buttons, or the content gets transformed to the same uniform colour.
- Select the colours tab from the style panel of the editor.
- The colours at the top are the ones most commonly used for the website.
- If you want to change the colours, click on ‘change’ next to the colours and pick the shades you want to incorporate.
Local
Changing colours locally will help you adjust colours for specific sections (buttons, headings or subheadings).
Select a specific element, click on edit, and change the colour.
For example, if you have selected the global colour as green and want to highlight ‘Subscribe to our Newsletter’ in red, you can change it this way.
2. Font
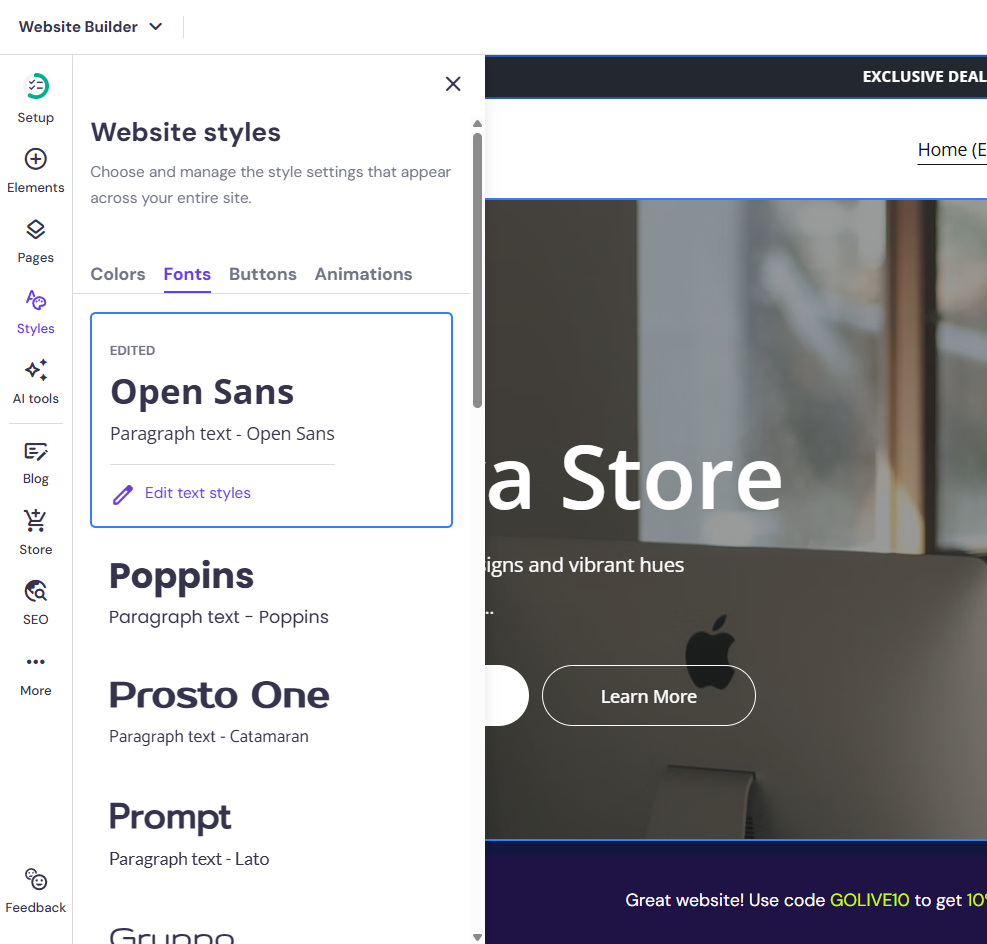
Each user has a specific brand visual tone in mind. They have the liberty to customize the font accordingly.
Be it minimal, bold, or formal, users can experiment with a wide range of options to establish a distinct visual identity. Just like colours, you can customize the fonts,both locally and globally.
Suppose you want to change the text type of all H2s, you can do it globally. Choose the desktop mode or mobile mode according to your requirements. All the changes you have made will be reflected in the specific device.
Global
- Click on the ‘Text tab’ on the Styles panel on the left of the editor and choose your preferred font from the wide plethora of options.
- Click on ‘Edit text styles’ if you want to cutomize.
- Be it paragraphs, headings or subheadings, select the section you want to customize and adjust the font, size, or capitalization accordingly.
- However, you can also create two distinct font families for headers, subheadings, and navigation.
Local
Just click on the particular element you want to make changes to, click on ‘Edit text’ and start making the changes. Users also have the liberty to upload and personalize fonts locally.
3. Adding new items
As your business grows, you can keep adding pages, website elements, and sections to match the brand vision and make sure visitors stay abreast of the latest information. .
Pages

- To add more pages, click on ‘Add page’ after expanding the pages and navigation panel within the AI Website Builder.
- Go to the left of the page and select the type of page you want to add.
- On the right, you will find a page thumbnail.
- Select the thumbnail to add it to your website.
- If required, you can customize the page settings (edit the URL, change the name of the page, hide page) and save your changes.
- Make sure to update the website for the changes to be reflected.
Section

- You can also add a new section on your website.
- The options include headlines, images, footers, about section, or contact forms.
- Within the builder, just take your cursor between two specific sections, choose the options from the left of the screen and simply add a section.
- You can also design a blank section from scratch and customize it.
- Click on the section you want to make changes to.
- Go to the settings in the top-right and make your required edits.
- You can edit layouts, change the background, make duplicates of a specific section, change the position, and even generate images.
Website Elements
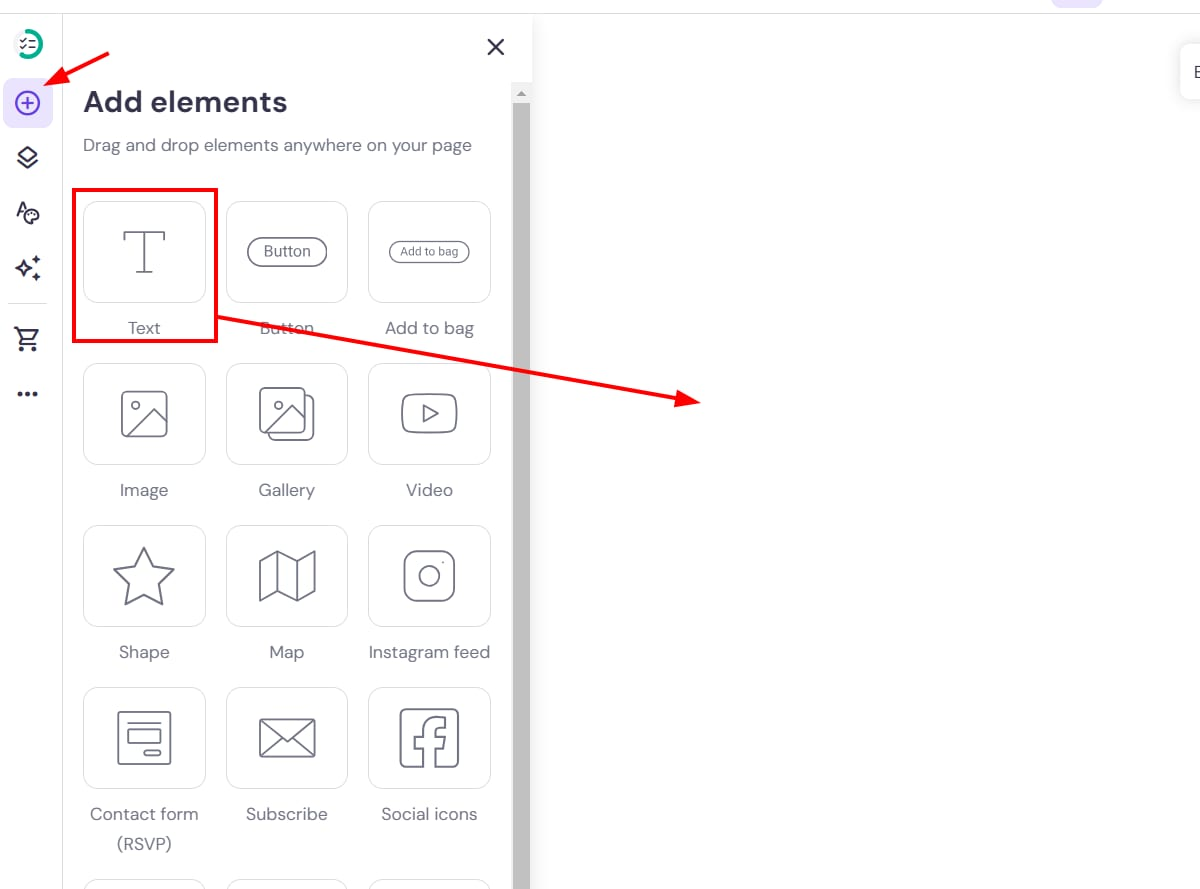
Website elements are primary components that make your website look complete. These include texts, images, buttons, forms, or menus.
- Expanding the ‘Add Elements’ option on the left of the AI Website Builder will take you the options of elements.
- Simply drag and drop the element you want to include in the specific section.
- Click on the element to customize it your way.
4. Custom Code Integration
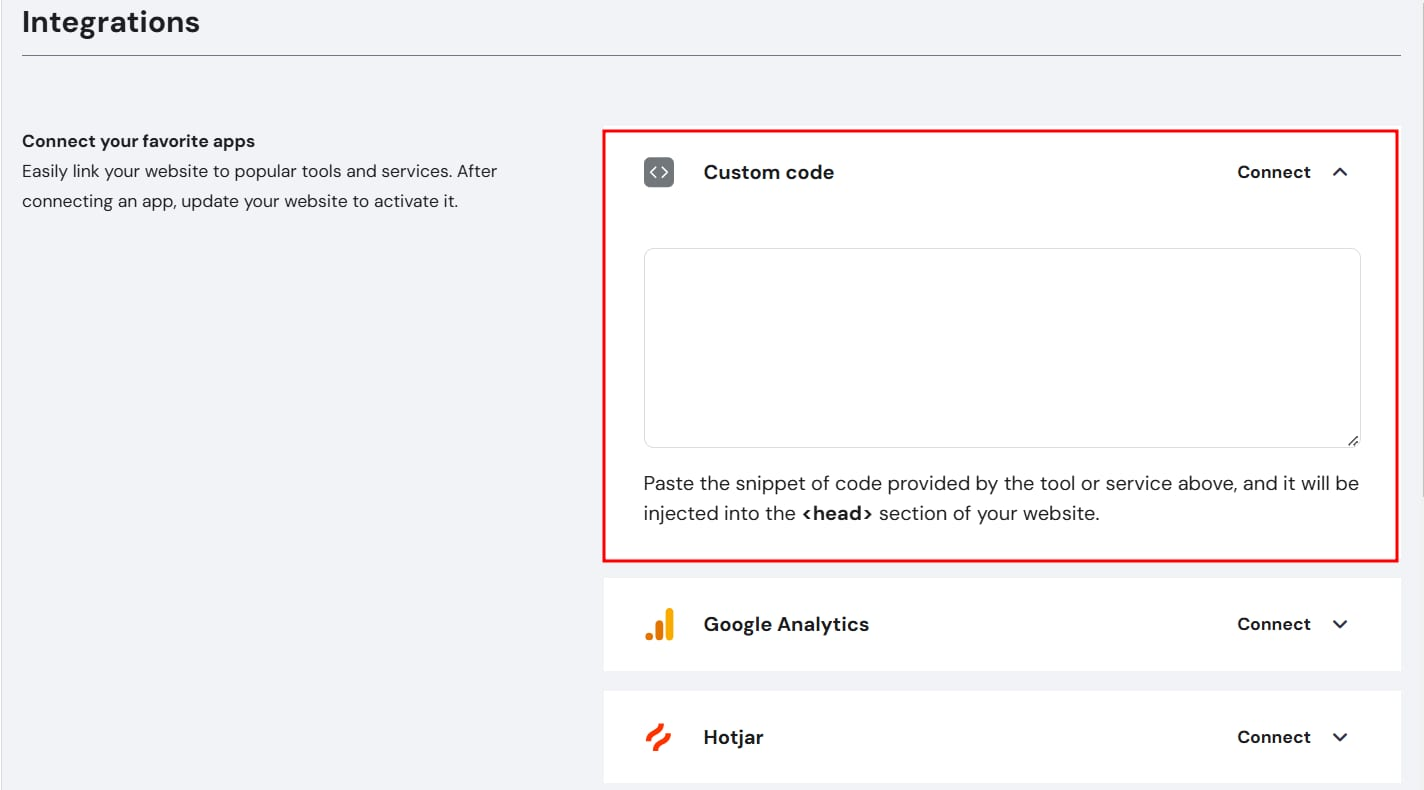
Beyond basic templates, custom code integration can help you experiment more with design and opt for advanced customization that makes the website look unique and also improves user engagement.
Apart from customization, you can also verify your platforms such as Google Ad Console or Facebook, or improve tracking through integrating with third-party tools.
Integrating custom code on Hostinger Website AI Builder is easy and involves a few steps.
- Click on ‘Integrations’ after clicking on ‘Website settings’ on the builder.
- Go to the custom field and paste the code.
- You can add multiple codes but paste the snippets one below the other to prevent overlapping.
- Update your website after you have saved the changes.
5. Mobile Layout
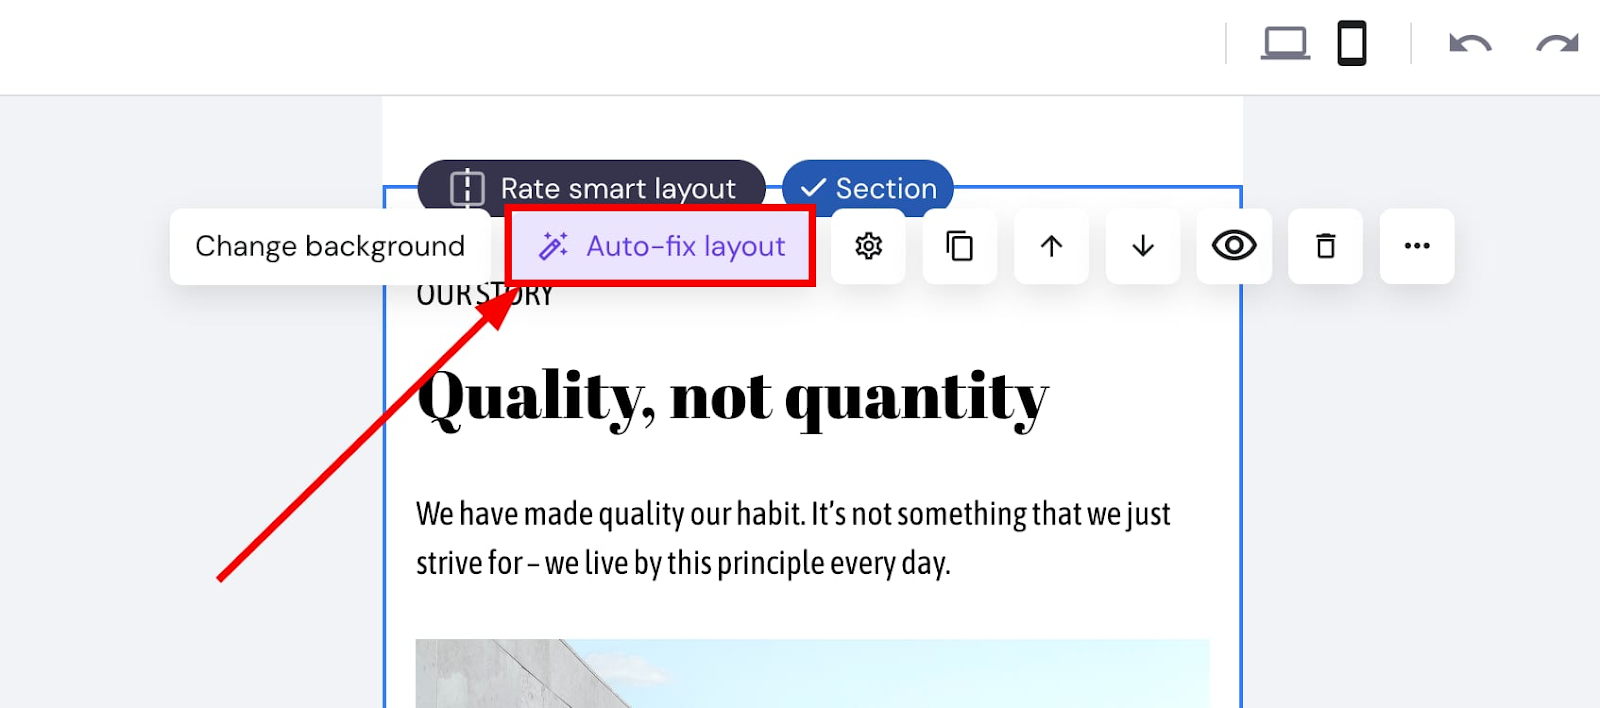
Users can personalize the mobile and desktop versions of the website separately to make sure it operates seamlessly across devices. However, elements of the website appear in the same chronology on your mobile as the desktop. In case you change the order, the mobile doesn’t automatically reflect them. You have to change it manually.
- If you want to switch to the mobile editor, go to the top tool bar and click on ‘switch view’.
- After you are done making required edits to the desktop version, click on ‘Auto-fix’ in mobile view layout to align it with the positioning of the desktop.
- Use the drag-and-drop option to shift the specific elements on the mobile.
- Use the resizing handles on the borders if you want to make adjustments to the size of elements.
- You can also change the font, text, and line height separately for your mobile.
- You can also change the position of the menu, by clicking on settings on the header section of the mobile view.
- If you want to change the position of the logo, go to the header settings of the mobile view, click on change logo, and adjust the settings.
Getting started with the AI Website Builder Dashboard
This dashboard of AI Website Builder Dashboard is tailored specifically for beginners, offering both simplicity and accessibility.
It has an intuitive interface with a drag-and-drop editor that allows the users to customize the website, add sections, remove elements, or edit images according to their vision without any knowledge in coding.
The wide range of template options make the design process easy. After the changes are made, users can get a real-time view of the design across various devices.
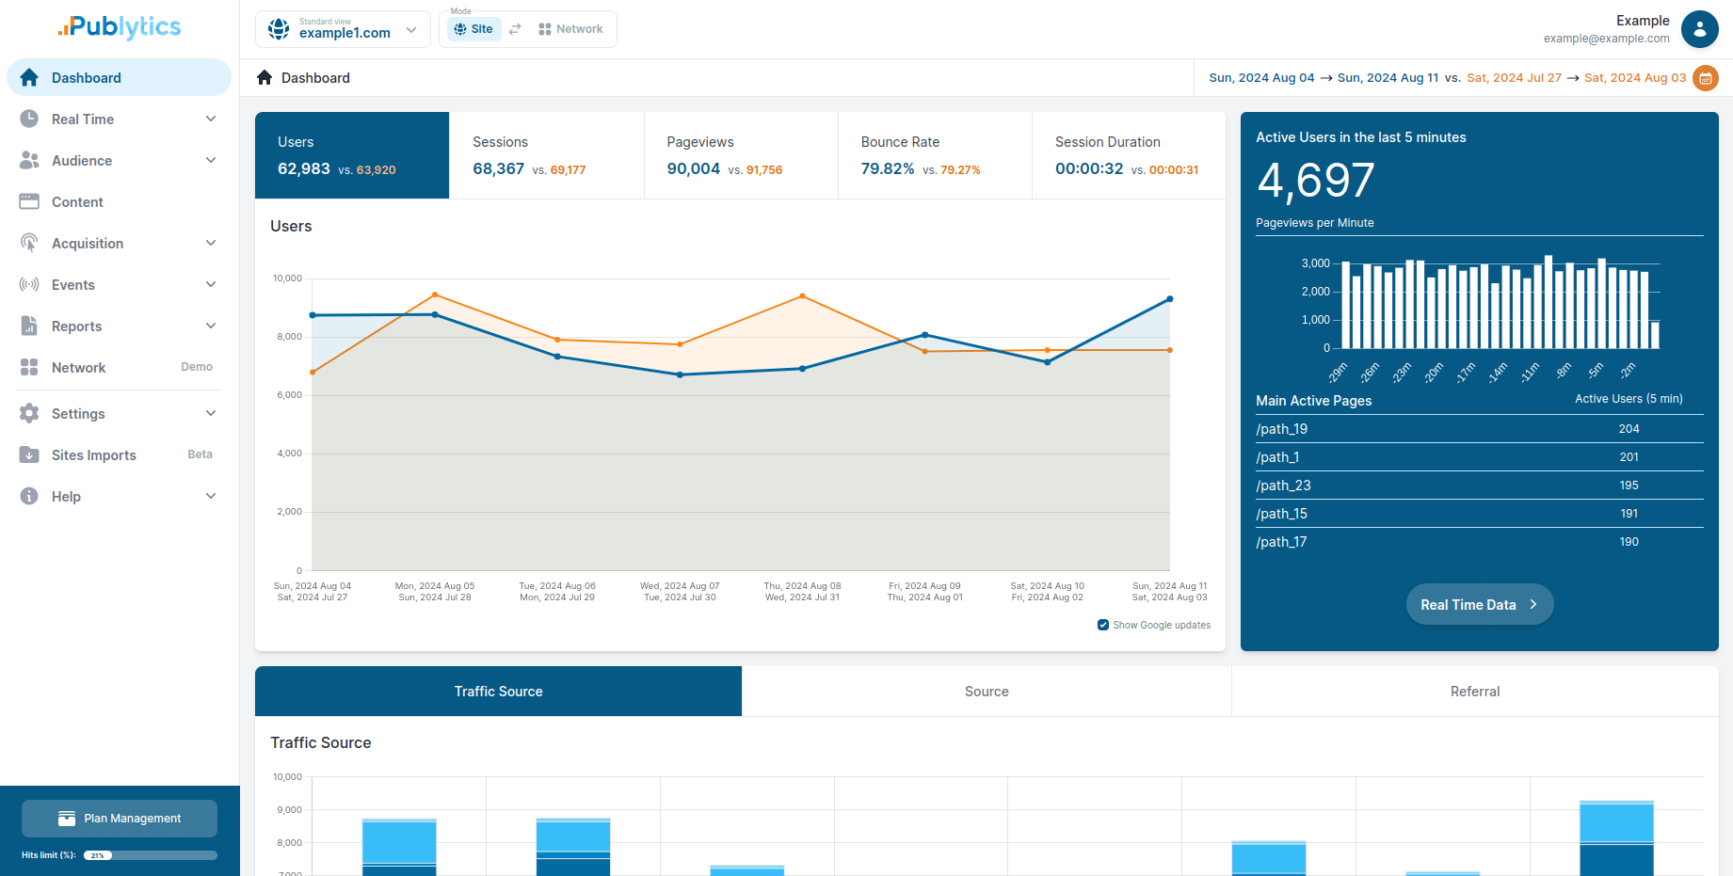
Analytics
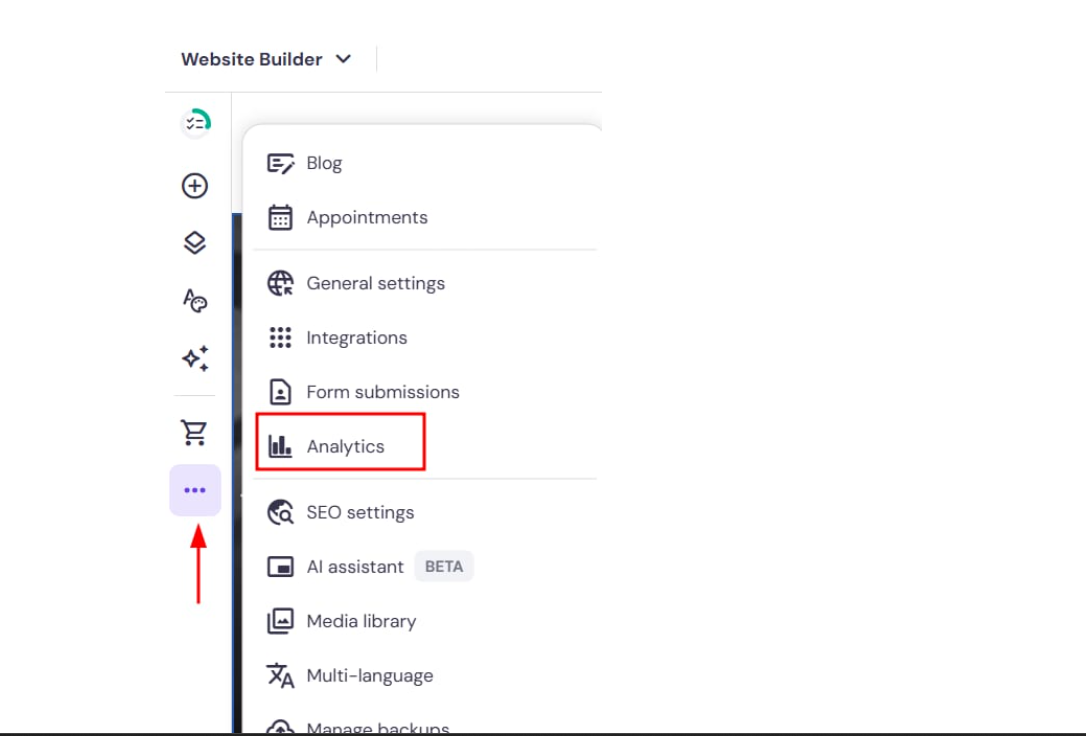
Hostinger AI Website Builder has a built-in analytics tool that helps users get an overview of the performance of the website and understand the patterns of the visitors who are bringing in traffic.
Within one hour of publishing the site, the analytics tools can help you track the data you are looking for. Users just have to click on ‘Analytics’ on the menu located on the left side within the Website builder editor. Here are some of the key metrics available on the dashboard:
Traffic overview: The analytics tool will help you track page views, number of visitors, determine whether you are being able to attract new readers, and uncover which story is helping you gain traction. Apart from repeat visitors, it will help users keep tabs on unique visitors.
Sessions over time
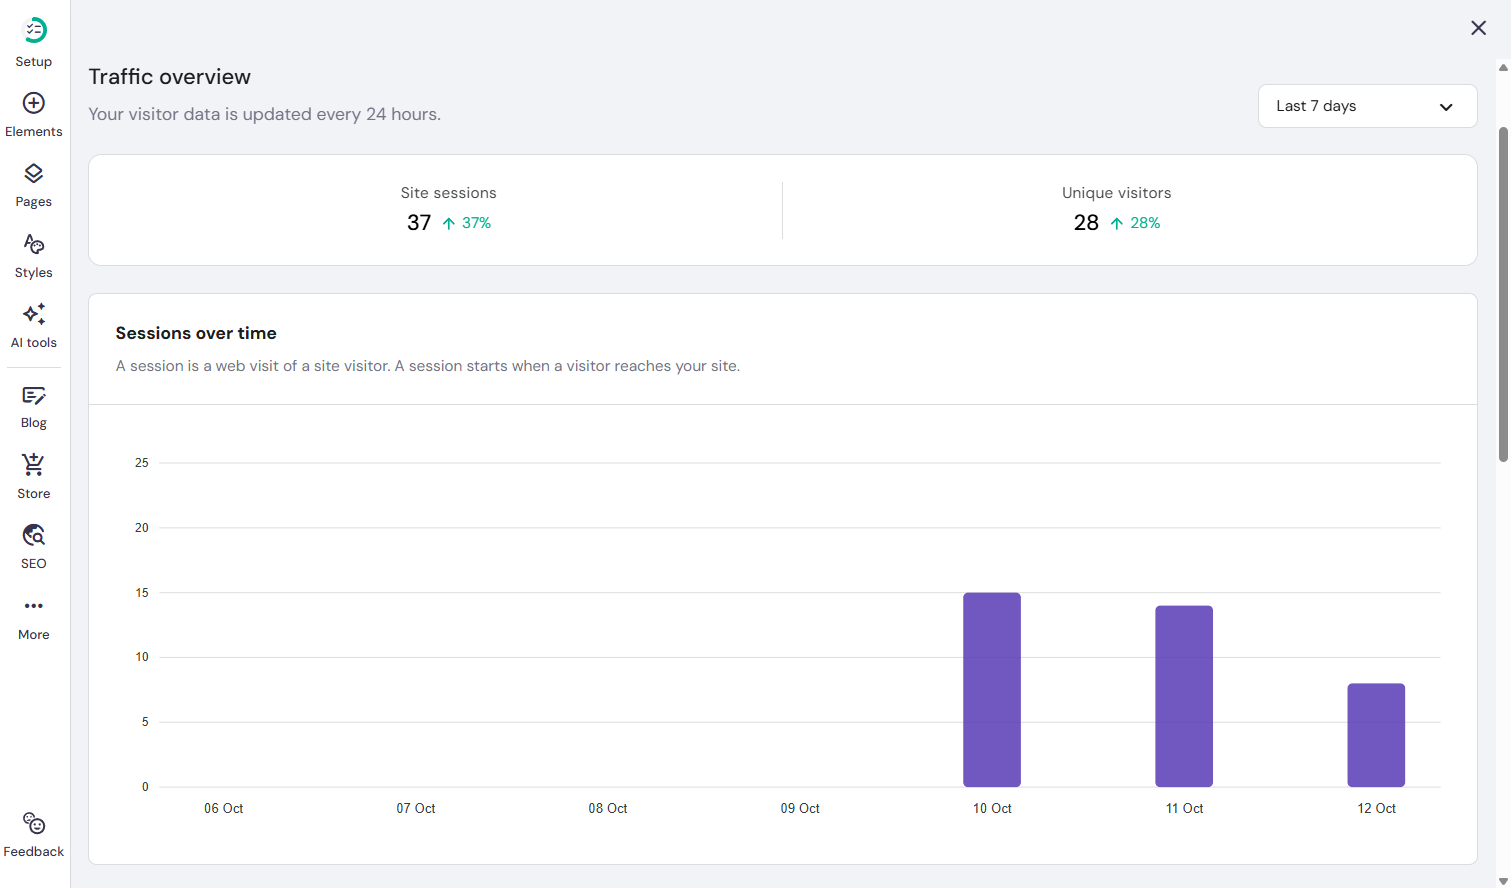
A session usually starts when a user visits your website and ends when their activity is over. For example, users could navigate through the menu page, check the verticals, read the best articles, and finally exit. This entire time period is considered a single session. If the users visit the site again during a different time of the day, it will be considered a new session.The tool can help you check the total number of sessions over the last 7 days, 10 days, or a month to form a strong understanding of the audience behaviour.
Sessions by country

Your site can have visitors from different parts of the globe. Be it US, India, Netherlands, or Australia, understanding the demographics of your audience can help you take informed decisions related to your business.
For example, if your website has maximum traction coming in from UK, you can tailor the ad campaigns accordingly or even localize the content with to retain your audience and drive more conversions. In case of an e-commerce online store, you can offer special discounts and offers to that particular region.
Sessions by device
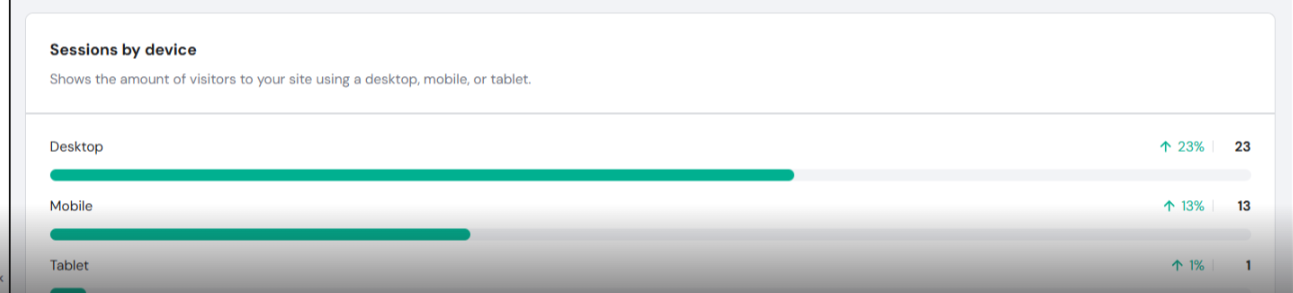
You can also check the devices from which your audience is accessing the site (mobile, phone, or tablet) and create a responsive design that removes all the frictions related to user experience.
If the majority of the audience is accessing the site from a desktop, you can run the device-specfic ads. In case there are bounce rates on mobiles, you can troubleshoot the issues to fix compatibility problems and improve user experience.
Hostinger collects the traffic data through the help of Cloudflare CDN and protects the data of users. The sudden drop or spike in traffic can help the you tailor the content according to the user behaviour.
Kodee
Kodee is integrated into the dashboard and serves as a conversational AI chatbot designed to assist users in various aspects of website creation and management.
It offers contextual guidance based on the tasks performed by users and help them make required modifications.
You can interact with Kodee directly within the dashboard to get comprehensive support related to tasks such as generating content, optimizing SEO, billing, setup, domain, and billing. Users don’t have to get in touch with the support team every time they need help. Kodee offers round-the-clock support to make sure user needs are addressed at every step.
Pricing
The Website Builder is available primarily under three subscription tiers considering the various requirements of users. The Starter Plan is priced at $2.99 per month and the Business Plan is priced at $3.99 per month.
With features like free domain for a year, one website, one annual mail box, more than 150 templates, and 50 credits for AI tools, the Starter Plan is perfect for portfolios or start-ups.
The Business Plan is the more recommended option due to its vast range of features.This includes up to 50 websites, four mailboxes, basic commerce, AI image generator, a text editor, and an AI-powered SEO optimizer that provides real-time recommendations for keyword usage and content improvements.
This plan is more suitable for developing businesses across all sectors. Hostinger AI Website Builder also has a cloud startup plan that is priced at $ 7.99 per month.
With features like 100 websites, 10 mailboxes for a year, premium e-commerce features, and drag-and-drop AI website builder, it is perfect for high-performing teams in need of robust operations and huge traffic.
Users can choose from multiple subscription durations, including one-month, twelve-month, twenty-four-month, and forty-eight-month commitments.
Users tend to opt for the 24-month plan most, though 48-month plan offers the most cost-effective pricing over time.
Support
Hostinger AI Website Builder has a robust support structure to guide users every step of the way as they navigate the platform.
The first level of support is managed by Kodee, the AI assistant, which has the capacity to address and resolve around 60–70% of customer requests by providing instant, automated solutions. Users do not need to communicate with live agents. However, there are certain issues which require human intervention. If Kodee fails to resolve the issues, the query is escalated to Hostinger’s global customer support team.
This team operates across time zones and languages, ensuring that users worldwide can access live human assistance whenever necessary
Besides, users can also opt for 24×7 live chat support. You can also log in to the Hostinger account, and click on the Help icon to chat directly.
The team is prompt enough to generate a reply within 20 seconds.The team is comfortable in more than 8 languages, ensuring there are no communication barriers with the global audience.
Be it AI website building, setup, customizing, or troubleshooting, the support team is here to assist users whenever they need it. You can also send your general queries to [email protected]. The team will reach out within 1 business day.
In case of self-learning, you can go through the articles covering various topics related to the AI Website Builder. You can also go through 500 video tutorials provided by Hostinger Academy.
Hostinger AI Website Builder Review
Here is what we loved about Hostinger AI Website Builder
- The drag-and-drop editor is essentially designed to offer minimal friction to the beginners.
- The pricing is affordable, with long term plan offering the best competitive rates.
- The integrated AI features make the concept of writing content, generating images, design, and search engine optimization easy.
- Kodee, the conversational AI chatbot, is here to offer 24/7 support to the users. It interacts with the users directly on the dashboard and guides them through the process of website launch, billing and even provides step-by-step solutions by suggesting relevant articles and videos.
- The wide range of options of more than 150 pre-designed templates is thoughtfully curated for various sectors and expedites the process of website design.
- Hostinger provides a significantly faster time-to-launch compared to WordPress due to unlimited prompting features and integrated AI tools.
- Featuring up to 600 products, more than 100 payment gateways, and no transaction fees, it supports the operations of budding online stores trying to scale their business.
- Offering comprehensive solutions through hosting and website building, Hostinger AI website builder makes sure users don’t have to depend on third-party tools.
- The speed and performance of the sites are reliable and impressive, offering a smooth experience to the visitors.
Areas of improvement
- Though the pre-designed templates help in designing and launching the site swiftly, the customization features are restricted in comparison to custom-design tools.
- The design of the drag-and-drop editor is perfect for beginners but the users cannot switch from one template to the other. After opting for a particular design, if you want to switch to another layout, you have to restart your work.
- Since Hostinger uses AI tools to generate content for SEO, it is not suitable for publishers who want organic content.
- Hostinger is yet to match the advanced integration level of Shopify, which might be a requirement for large enterprises.
- There are no advanced features available for blogging and image editing.
Final Thoughts
Unlike traditional platforms such as WordPress, Hostinger AI Website Builder focuses more on simplicity, cost-efficiency, and providing comprehensive solutions, which makes it perfect for non-technical users looking for both speed and convenience.
With its drag-and-drop editor, AI-integrated features, and pre-designed templates, the platform speeds up the process of website development and launch, which makes it suitable for freelancers or startup owners.
However, the customization features may feel restrictive to expert designers. They might still have to make manual edits to get the desired outcome.
We would recommend this platform for organizations that are specifically seeking all-in one solutions such as hosting, website design, and domain set-up in one platform.